Having tried a few VR headsets in the past including the original Oculus Rift and Quest 2 and finding them uncomfortable to wear or the display quality being too poor for productivity use, I decided to take the plunge with the Quest 3 when it came out. Compared to the Quest 2, the Quest 3 has a much improved optical design (pancake lenses vs fresnel on the Quest 2) and weight distribution making it comfortable to use for extended periods of time. The display sharpness is also good enough for general productivity use for many hours a day. While the display quality isn’t as good as on a Mac (sharpness, contrast, colour accuracy, lens artefacts), the ability to use virtual displays in a virtual space is nevertheless great for focus, productivity and privacy, especially when working while travelling.
In an ideal world…
As I use the Quest 3 mostly as a virtual monitor for my M1 Max MacBook Pro, the ideal scenario would be to connect the Quest 3 directly to the Mac and have it output a DisplayPort signal, which treats the Quest 3 as a standard external display, perhaps with some processing to keep the display fixed in virtual space (something like the XReal Air 2). Unfortunately, the Quest 3 doesn’t support USB-C alternate modes and DisplayPort input, so this is probably out of the question. Alternatively, it would be great if we could stream the virtual displays over the local network, or to a hotspot created by the Quest 3 for portable use.
While there isn’t a native way of using the Quest 3 as a virtual display on Mac, there are many apps which can help with this function. These are the ones that I’ve tried:
Immersed


This is my go-to app for Quest 3 productivity use at the moment. Much like all the solutions in this list, Immersed uses a desktop streamer app installed on the Mac and an app installed on the Quest 3 available on the Quest store. In normal use with Mac and Quest 3 connected to the same Wifi network, the virtual desktop is streamed over the local network. There is a fall-back option which routes the streams over the internet if Mac and Quest 3 are unreachable over the local network, but this option adds significant latency as well as eating into any data allowance you might have. Finally, there is a “USB mode” which is in beta and requires you to enable developer mode on the Quest 3, and gives you the lowest latency option by wiring the Mac directly to the Quest 3 via USB-C. Immersed is free to use, and the “Pro mode” gives you more features such as support for 5 virtual displays and better team collaboration features for $4.99 a month.
Pros:
- Immersed allows you to create virtual monitors (up to 5 in “Pro” mode) in addition to your primary displays. Like in Horizon Workrooms, these are treated as normal monitors by MacOS, i.e. open windows will be moved to their last position on the virtual monitors upon reconnection
- While the streaming bitrate can be set quite low (to ~1MB/s while playing video), the latency is good (~50ms depending on network conditions and stream quality). You can increase the stream quality and even retina oversampling on the Mac client for even better quality at the expense of higher network utilisation and encoding latency.
- Immersed sometimes works without an internet connection, in a plane or hotel room for example. You can set up a personal hotspot with a phone or portable router to connect the Mac and Quest 3, then stream the virtual displays over this local network, or use the low latency USB mode. However, there are some issues and caveats to this (more in cons section)
- You can change the size/resolution of your virtual displays
- There is an option to turn off the built-in Mac display automatically while using the Immersed virtual displays in VR, and the built-in display will automatically turn back on when you exit Immersed or take the headset off. This is a convenient power saving feature when travelling
- There is an option to enable a “virtual cursor” which is an overlay over the “real” cursor in the Immersed app and gives the impression that the latency of your mouse movement is lower than it actually is
- You can arrange the virtual monitors almost any way you like, including changing the position, distance and curvature
- There is a lot of support, tips and discussion on their Discord server which is very well organised
- Keyboard passthrough allows you to see your desk and keyboard even if you are in a virtual environment
- You can join public rooms where you can work and chat in the presence of other Immersed users
- In a pinch, you can use a virtual keyboard and controllers as a mouse and keyboard, but it is not comfortable enough for daily use
Cons
- Currently, “offline mode” feels a bit like an afterthought and doesn’t always work as expected. The Immersed app on Quest 3 and Mac needs to connect to Immersed servers every now and then to authenticate your account before you could use it, even if the virtual displays will be streamed locally over wifi or USB. The staff at Immersed have confirmed that they are looking into improving the offline experience and iron out some of the bugs currently in offline mode, but as of now (October 2023), I wouldn’t rely on Immersed if I’m travelling on a plane or somewhere without an internet connection.
- In USB mode, while the monitors are streamed over USBC, the Mac and Quest 3 still need to be connected to the same network (ideally with an internet connection if the apps need to authenticate with Immersed servers) in order to start the session. You can disconnect from the network once the USB streaming is in session
- While there is flexibility in arranging your displays in virtual space, Immersed currently doesn’t do a great job of saving your arrangements or having the displays show up the same way each time. I find myself adjusting the monitors slightly every time I start an Immersed session to get the position just right.
- The loading time on the Immersed Quest 3 app is looooonnngg. It usually takes around 35 seconds from starting the app to getting the monitors connected and positioned before I can start working.
- There is a feature on Quest 3 which automatically detects compatible keyboards and does a passthrough for it, however I found it doesn’t work consistently (this is more of a problem with the keyboard detection feature on the Quest 3 though rather than an Immersed issue).
- There is no easy to use “desk passthrough” feature like on Meta Horizon Workrooms. You could set up custom passthroughs to see your desk, but these are all reset if you use the “reset positions” button, which I have to use every time I start a session to get the monitors to quickly snap to their proper positions
- While there are many quirky virtual environments to choose from, I do wish there was a nice and simple office/desk environment like in Meta Horizon Workrooms.
Virtual Desktop
Another popular desktop streaming app for Quest 3 which supports Mac. Virtual Desktop works slightly differently to Immersed in that you can’t set up multiple virtual monitors in VR (you are limited by the number of physical monitors you have, and multi monitor support in VR is not supported in Virtual Desktop on Mac anyway). Virtual Desktop streams over the local network, or over the internet as a fallback option. However, unlike Immersed, there is no wired/USB mode on Mac. Virtual Desktop is a one-time purchase of £14.99 on the Quest store.
Pros
- Virtual Desktop can work consistently without an internet connection, hurrah! Both Mac and Quest 3 must be on the same Wifi network (could be a hotspot on a phone or portable router), but an internet connection is not required upon startup from my testing. This is great if you are on a plane and want to get some work done in VR. Sometimes the Quest 3 and Mac have difficulty finding each other in offline mode, but restarting the apps on either end fixes this for me
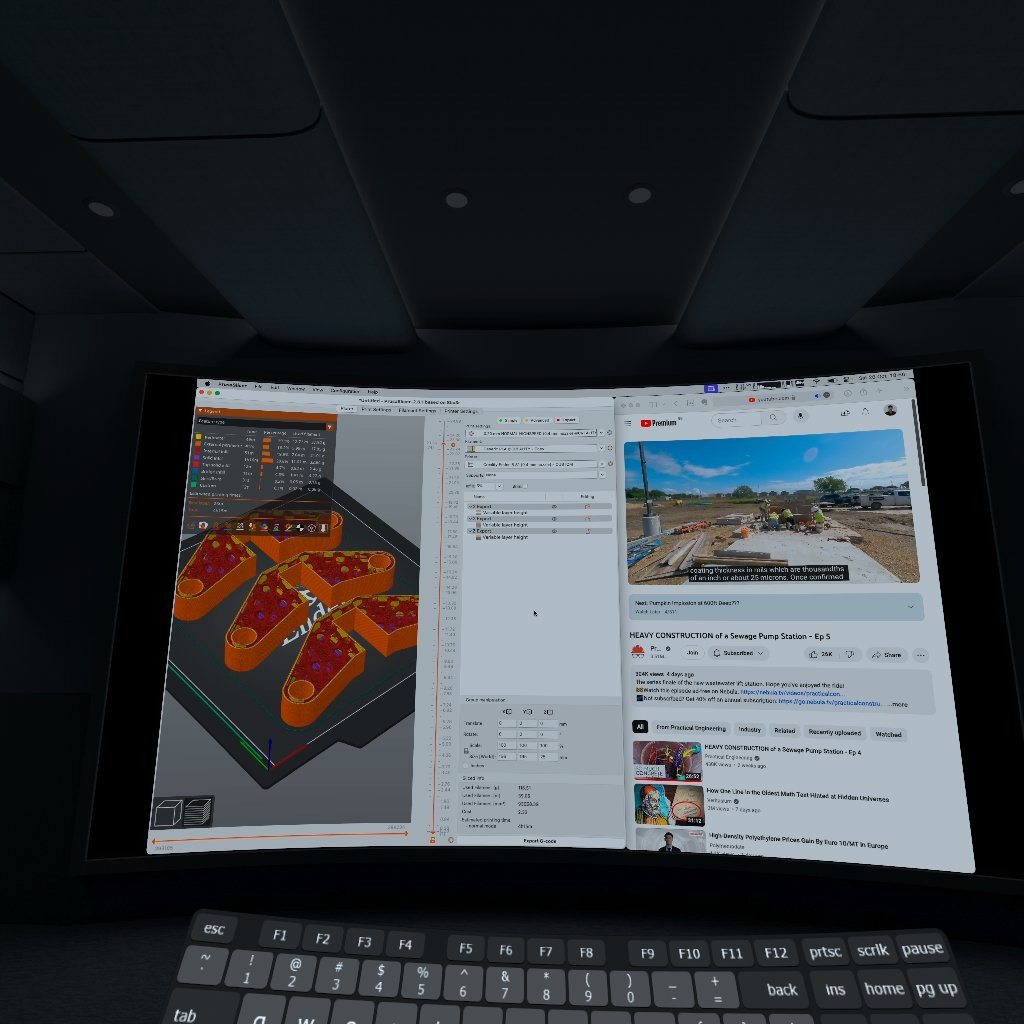
- Rather than simply mirroring the laptops display, Virtual desktop can change the resolution of the virtual display depending on its size in VR. Not only could you get a larger display in VR, but also more display real estate
- On the “void” or passthrough modes, you can change the size, position, distance and curvature of your virtual monitor, and these settings are saved so your monitor appears exactly the same way each time you use Virtual Desktop
- Virtual Desktop loads fairly quickly and I can usually connect to my virtual monitors within 10 seconds of launching the app on Quest 3.
- The quality of the virtual environments is great
- The feature where you can use the controller as mouse input works surprisingly well (although double clicking is hit and miss)
- Virtual Desktop supports 3D video playback, and Steam VR features on Windows although I haven’t tried these
Cons
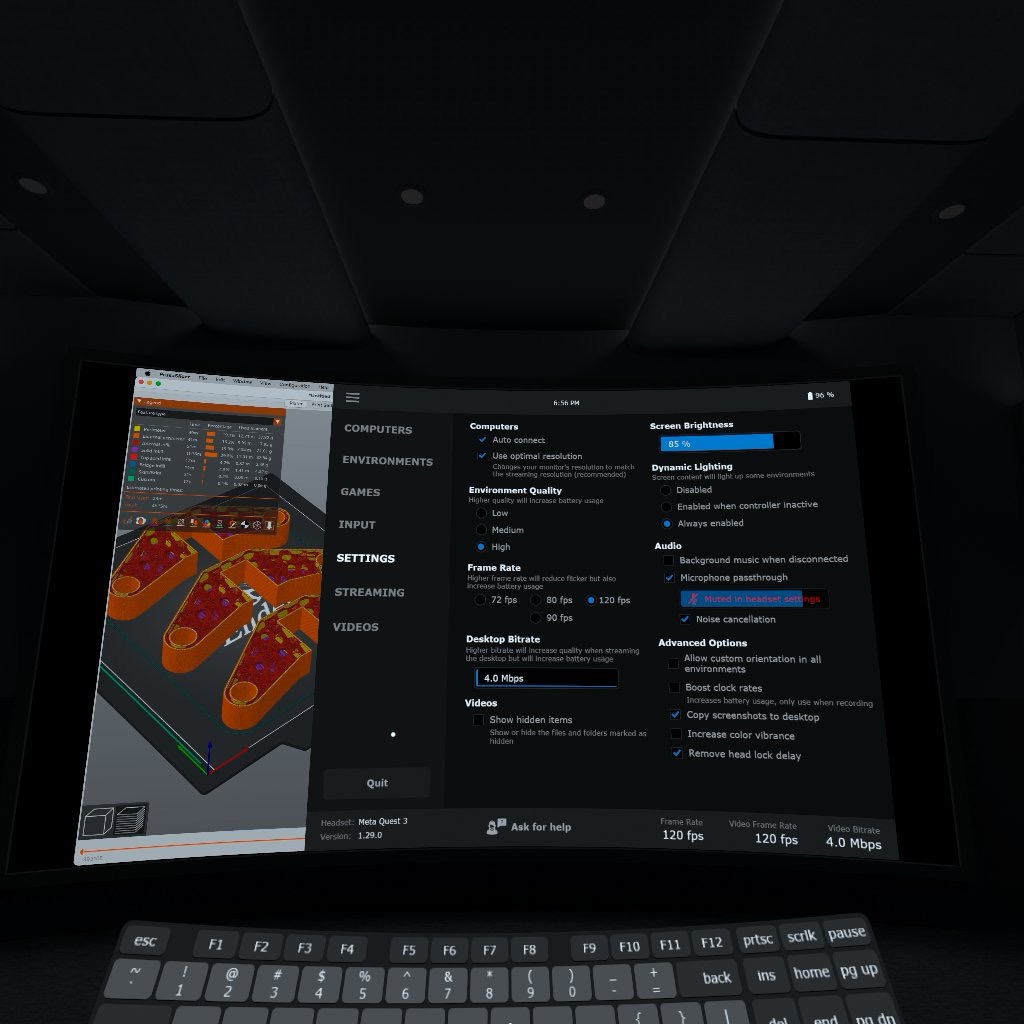
- The quality of the virtual display video stream is really high on MacOS, even when set to the lowest setting in the app (4Mbit/s). Playing a video on a VR monitor can easily reach 4-5Mbytes/s over the network (which is around 32Mbit/s, higher than 4Mbit/s, so perhaps this is a bug?). Using MacOS mission control or scrolling through large areas of the display results in a lot of network activity compared to Immersed or Meta Horizon Workrooms. Unless you are connected by ethernet or on Wifi 6E, there will be a lot of latency and stuttering. This limits what you can comfortably do on Virtual Desktop while connected to a personal hotspot while travelling for example. I find that for emails/word documents/spreadsheets, the added latency is tolerable. While it is great that the quality of the stream is high for home use with ethernet/Wifi 6E, I do wish there was a way of lowering the stream quality even further so latency and network performance is comparable to Immersed. Much of the discussion on Virtual Desktop Discord server revolves around optimising your network and eeking out the highest bitrates and best image quality you could get, which is great, but for productivity use, a reliable stream is more important than a marginal improvement in quality you get from higher bitrates.
- Virtual Desktops does not support multiple virtual displays on Mac
- There is no desk/keyboard passthrough in virtual environments. To see you keyboard, you have to be in passthrough mode (where the virtual displays are overlaid onto the passthrough), which could ruin the immersion depending on how messy your room is
- While using Virtual Desktop, you need to turn off your Mac’s primary display manually (by turning the brightness all the way down) while in VR if you want to preserve battery life or for privacy
Meta Horizon Workrooms


While the main feature of Horizon Workrooms is for collaboration, there is also a nice virtual desktop feature too. The Virtual Desktop environment on Horizon Workrooms feels the most refined compared to Immersed and Virtual Desktop, and the desk passthrough feature is simple and intuitive to use. Horizon Workrooms streams your desktop over the local network, with fallback to internet if the devices can’t reach each other locally. Meta Horizon Workrooms is currently in beta and free to use.
Pros
- There are currently 3 desktop environments available, and they’re all beautifully designed
- The default 3 monitor setup can’t be moved/changed, but is very comfortable to use at just the right size, distance and curvature for me
- The desktop passthrough setup is amazing and simple to use on Quest 3. The passthrough appears in exactly the same place each time so there is minimal setup every time you use the app
- The bitrate of the stream is quite low so it is not too taxing on congested local networks
Cons
- Horizon Workrooms does not work at all without an internet connection, even if Mac and Quest 3 are on the same local network. This is a shame as it could have easily been my daily driver for VR desktop use.
- If you set up all 3 virtual monitors, Horizon Workrooms doesn’t remember this so you have to add the two extra monitors every time you start the app. This adds about 4 seconds to the startup time, although the app launches and connects quickly so despite this I can still get to work faster than with Immersed
- Perhaps the streaming bitrate of the virtual desktops on Horizon Workrooms is too low, as I notice a lot of frame drops and stuttering even on an uncongested Wifi 6E network/ethernet. It would be great to be able to adjust this manually
- You need to turn off your Mac’s primary display manually (by turning the brightness all the way down) while in VR if you want to preserve battery life or for privacy
- You can’t change the resolution or size of your virtual displays
Final Notes
- This post was written in late October 2023, and I’m hoping that these apps would be improved over time, especially support for offline use
- The screenshots from the Quest 3 shown here are a lot more pixellated than what I can see in real life. Also the field of view I can see is much wider than the screenshots, as they are from the left eye only and cropped
- My setup is: MacBook Pro 14 M1 Max running MacOS 14.1 Sonoma, Meta Quest 3 with OS version 57, Wifi 6, 6E router running on DFS channel for 5GHz, or iPhone 14 Pro Max/Android AP hotspot on 5GHz